MacOS Software Updates
MacOS Minimum Version Requirements
In our ongoing commitment to strengthening cybersecurity across the district, Technology Services will be enforcing a minimum operating system version for all Mac computers.
Once the policy is activated, you will receive a notification on your Mac alerting you that a scheduled managed update is available and must be acted on. Your computer operating system will update automatically on the date specified or you can initiate it yourself beforehand.
Please be aware that the update process may take a considerable amount of time, depending on your current operating system version.
Before starting the update
- Perform a complete shutdown and restart of your computer. During our testing, this step has proven to resolve several issues that were encountered.
- Connect the computer to power.
The appearance of the update screen may vary depending on your current operating system, one such example is shown in figure 1.
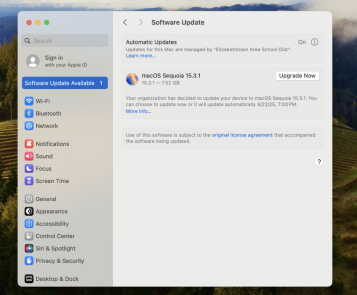
Figure 1. Apple system Settings Software Update screen showing an operating system update.
Authentication
If you are prompted for an administrator username and password, as shown in Fig. 2, please use your district username without “@etownschools.org” (e.g., john_doe) and your computer login password.
If you are unsure whether the prompt is legitimate, please leave it open and contact the Technology Services Helpline immediately at extension 11199.
Please do not hesitate to contact us if you have any concerns regarding this process. If you encounter any issues during the update, please submit a tech request through IncidentIQ.
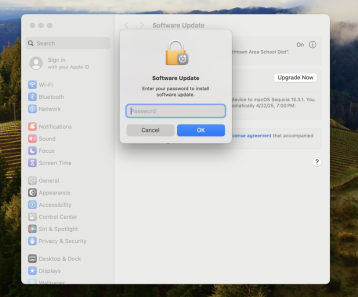
Figure 2. Software update prompting for a password.
Enable Access to Local Network
After upgrading to the newest OS on your laptop, some new security settings will need to be adjusted to access local resources.
To view HS announcements and other local content, follow these steps to allow your Mac to see devices on EASD WiFi:
- Open System Settings – Click the Apple logo () in the top left corner and select System Settings.
- Go to Privacy & Security – Scroll down the left menu and click Privacy & Security (blue icon with a white hand). (see Figure 3)
- Find Network Permissions – Scroll down to Local Network Access (this controls what apps can connect to other devices on EASD WiFi). (see Figure 3)
- Allow Access – Turn on access for apps like Google Chrome or the CCTV Client so they can display announcements and other school content. - (see Figure 4)
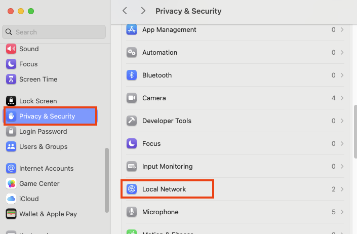
Figure 3. MacOS Privacy & Security settings to configure Local Network.
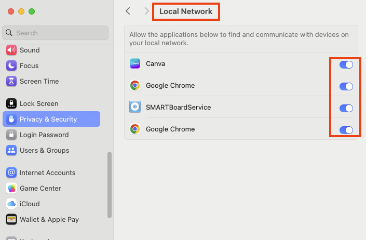
Figure 4. Enable Local Network settings to connect Mac to devices on the EASD network.